
Getting the right sublimation time and temperature is a crucial factor for vibrant, long-lasting prints. If your outcome is faded, blurry, and not transferring properly, incorrect heat press settings could be the main reason.
I have faced the same issue during my printing journey and in four years of my printing I have worked on various substrates and have mastered heat press settings.
Soon after starting my journey, I realized, achieving perfect prints is not only about having the right equipment. The actual magic is in mastering heat press time and temperature settings.
Every substrate needs different heat press setting due to their properties and it is difficult to achieve right settings in your vey first attempt.
You may have to print various samples with different settings to know the optimum heat and temperature which will also need some investment, but if you don’t want to waste the material or have less budget than you can easily skip ghosting effects, blurry prints with this simple guide where you will learn about heat press and what is the optimum settings for each substrate.
Quick Answer – The ideal sublimation temperature generally ranges from 375°F to 400°F, and the pressing time ranges from 45 to 60 seconds for fabrics and up to 200 seconds for mugs, depending on the material you are using.
Understanding Sublimation heat press settings
For operating the heat press correctly, you need to take care of three major things i.e. time, temperature and pressure.
1. Time
Time plays a major role as pressing the substrate for too long can cause the image to bleed or blur out, but pressing it for too short a duration will not let the image transfer properly.
Recommended pressing time
- Ceramic mugs – 180 to 200 seconds
- Fabrics – 45 to 60 seconds
- Hard boards and metal – 60 to 90 seconds
2. Temperature
Temperature is also a very important aspect in achieving vibrant prints as it activates the ink and lets them make permanent bonds with the substrate. If the heat press temperature is too low then you may get incomplete transfer, resulting in dull/faded colors. But if the temperature is too high then it could scorch the material or cause ink to bleed.
Recommended temperature range
- Ceramic mugs – 400 °F
- Fabrics – 385 °F – 400 °F
- Hard boards and metal – 375 °F to 400 °F
3. Pressure
Pressure is another most important factor because too much pressure can cause substrate damage or warp, and too little pressure can cause uneven transfer.
Adjusting pressure
- Light – Optimum pressure for delicate items which might be crushed or damaged easily.
- Medium – Best for most fabric transfers.
- Heavy – Ideal for hard substrate to ensure an even and complete transfer.
You can experiment with various pressure settings on different materials to get the sweet spot for the specific materials.
Setting up heat press
If you have just started your sublimation journey, then setting up your heat press is overwhelming. But do not worry as I will walk you through the step-by-step process. By completing this process, you will feel confident and will begin pressing. Here are the steps.
1. Set the time
- Timer setting – You can use the control panel to adjust the pressing time. Timer of 45 to 60 seconds is best for most fabric transfers. But if you are working with mugs then set it to 180 to 200 seconds.
- Begin pressing – Place the substrate and sublimation paper in the heat press, close it and start the timer.
2. Pressure setting
- Manual adjustment – Many heat press machines have a lever or knob for adjusting pressure. For more pressure, turn it clockwise and for less pressure, turn it counter clockwise.
- Testing pressure – Place the sample substrate in the heat press and then close it. You will feel the resistance, but it should not be too difficult to close.
- Check evenness – Make sure the pressure is even across the surface as uneven pressure can result in incomplete image transfer.
3. Temperature setting
- Power up – First turn on the heat press and let it warm up.
- Adjust temperature – With the help of a control panel, set the desired temperature according to the material you are working. Like for ceramic mugs you need to set it to 400°F.
- Preheat – Allow the heat press to reach the desired temperature before beginning any pressing.
How to test sublimation temp and time settings on scrape substrate?
Before printing your actual projects, it is best to test your heat press settings on scrape substrate. It will let you reach optimum settings and will reduce wastage.
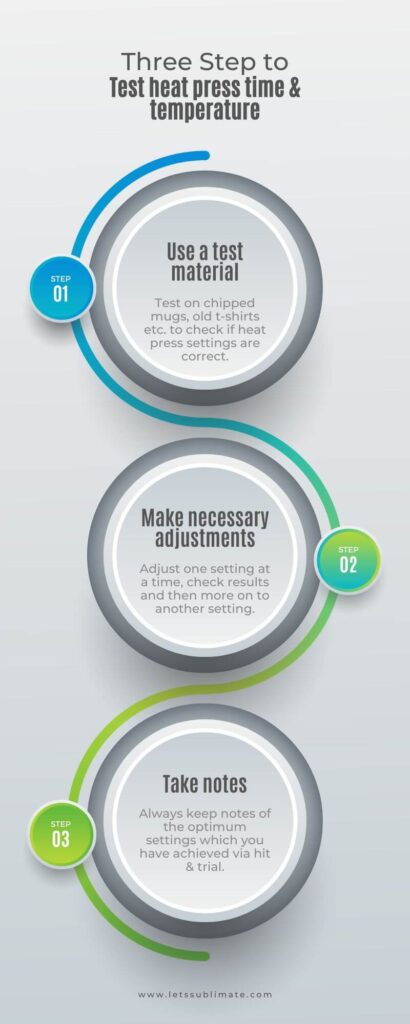
Step 1 – Use a test material
Always keep some separate defective material for testing. It can be a chipped mug, pieces of fabric or an old shirt.
Step 2 – Make necessary adjustments
While making adjustments, you should adjust one setting at a time. For example, try to increase the temperature a bit if the prints are light. If your edges are blurry then reduce pressure or time of pressing.
Step 3 – Take notes
Always note your successful settings for various substrates. It will be your handy reference for future projects and will save you lots of time.
Material specific sublimation temperature and time settings for heat press
Different substrates need different settings for getting the best printing result. Here is the breakdown of ideal time, pressure and temperature for 3 common sublimation materials.
1. Fabric
| Category | Polyester | Cotton blends ( with sublimation coating) |
| Time | 45 – 60 seconds | 50 – 60 seconds |
| Temperature | 385°F to 400°F | 375°F – 385°F |
| Pressure | Medium | Medium |
Tips
- Use protective sheets to avoid marks or scorching.
- Make sure the fabric is wrinkle free and smooth before pressing it.
2. Hard substrates
| Category | Ceramic Mugs | Metal | Acrylic |
| Time | 180 – 200 seconds | 60 – 90 seconds | 90 seconds |
| Temperature | 400°F | 375°F – 400°F | 385°F |
| Pressure | Medium to heavy | Medium | Light to Medium |
Tips
- Let the ceramic mugs cool slowly to avoid cracking.
- Use the heat resistant tape to secure the sublimation paper.
3. Special items
| Category | Phone case | Puzzle | Key chains |
| Time | 60 seconds | 50 – 60 seconds | 45 – 60 seconds |
| Temperature | 375°F – 385°F | 400°F | 385°F – 400°F |
| Pressure | Medium | Medium | Medium |
Tips
- Be careful while handling hot items after pressing.
- Make sure the entire surface is covered with transfer paper.
Troubleshooting common issues
Even with proper settings you may face some issues due to different heat press brands and substrates. Here is the solution to it.
| Category | Reason | Solution |
| Blurry Prints | Excessive time – Pressing for a long duration can cause images to blur. Incorrect pressure – Too little or too much pressure can result in blurry prints | Adjust time – Try reducing the press time slightly. Decrease in 5 to 10 seconds increments until you achieve clear prints. Check pressure – Make sure the pressure of the heat press is neither too high nor too low. For most of the materials, medium pressure works best. |
| Color not transferring correctly | Low temperature – The colors will not transfer correctly if the heat press temperature is too low. Insufficient time – If you are not pressing long enough can result in incomplete color transfer. | Increase temperature – You should gradually increase temperature in small increments and check results after every adjustment. Extend time – Check the color improvement after increasing the pressing time for a few seconds. Stop when you achieve the right colors. |
| Ghosting effect | Movement during pressing – Make sure the transfer paper does not shift during pressing as any movement while pressing can cause a ghosting effect. Uneven pressure – Make sure the pressure is distributed evenly across the entire surface of your material. | Secure transfer paper – Always use heat resistant tape to secure yoru transfer paper. Ensure even pressure – Check if the pressure is distributed evenly across the surface of material. |
| Faded prints | Low ink density – If you are using too little ink, it can cause faded prints. Incorrect settings – Incorrect time, pressure or temperature settings can result in faded prints. | Increase ink density – Make sure you are using the right amount of ink for transferring the prints. Recheck settings – Verify if all settings are correct as per the manufacturing guidelines of heat press and substrate. |
| Streaks or lines | Dirty heat press – Lint or residue on the platen of heat press can result in streaks or lines. Defective transfer paper – Poor quality or damaged transfer paper can result in streaks or lines. | Clean heat press – Make sure you are regularly cleaning your heat press to remove any residue or debris. Using high quality transfer paper – Always invest in high quality transfer paper and check for any kind of defects before pressing it. |
If the prints are still not transferring properly, then read this detailed guide on why sublimation is not transferring and how to fix it step by step.
Conclusion
These are the optimum sublimation temp and time settings which you can use as a beginner to get the right color print. If you feel these settings are not good enough, try making changes as per the troubleshoot guidelines and I am sure you will get vibrant results. If you have any questions, let me know in chat or you can message me directly.
If you found this guide helpful, explore more sublimation tips and beginner guides on LetsSublimate to improve your printing results step by step.
Frequently Asked Questions
Q – What is the best temperature for the sublimation printing process?
The best temperature generally ranges between 375°F and 400°F, depending on the material you are using. Polyester material works best around 385°F to 400°F; however, ceramic mugs usually need around 400°F.
Q – How long should I heat-press sublimation designs?
Sublimation pressing time usually ranges from 45 to 60 seconds for fabrics and from 180 to 200 seconds for mugs and tumblers. The exact time range depends on your substrate and heat press settings.
Q – Why is my sublimation design not transferring even with the right settings?
If the sublimation design is not transferring properly, it could be due to incorrect pressure, poor-quality sublimation paper, or moisture in the substrate. You can check my complete guide on why sublimation is not transferring.
Q – Can I use the same time and temperature for all sublimation blanks?
No, different substrates need different time and temperature settings. Make sure to adjust your heat press settings based on the substrate to get the best results.