
When I began my sublimation journey, I was having multiple questions in my mind regarding how to use a heat press? What should be the ideal temperature and pressure? And much more. I found out the solution after quite a few experiments, but it took time. To save your time and money let me guide you with choosing the right heat press, and the best way of using it.
Choose right heat press
The initial step in heat pressing is the selection of the right heat press. There are multiple options in the market, ranging from small, portal machines to large, industrial sized machines.
While making selection, consider the type of item you are going to press.
If you are planning to press small items like phone cases or mugs, then a small press is perfect. However, if you are planning to sublimate large items like blankets or t-shirts then you definitely need a large press.
Other important factors to keep in mind while selecting the heat press is its temperature range, pressure adjustments and whether the heat press features the digital timer or the manual pressure adjustment.
Prepare artwork for printing
Once the heat press is selected, it is time to prepare the artwork. The design which you have created will be printed on the transfer paper and then it needs to be transferred on the substrate with the help of a heat press.
While creating the artwork ensure to use high quality graphics software and always create the design at 300 DPI or higher. It will ensure a clear and crisp design after printing.
Remember that sublimation heat pressing needs a mirrored image of the design. It means that the design you are creating will need to be flipped horizontally before printing on the transfer paper.
Prepare substrate
Now it is the time to prepare substrates which could be metal, ceramics, fabrics etc. Before pressing the design on the substrate, ensure it is clean and free from debris. It will also ensure that the design adheres properly and outputs a high-quality finished product.
If your substrate is a fabric, then I recommend it to pre – press the material for few seconds for removing wrinkles and moisture. It will also help to ensure that the final product looks amazing.
How to prepare sublimation ink?
It is important to prepare the sublimation ink before pressing the design on the substrate. Sublimation requires a special type of ink which is available in multiple colors. When you are preparing your ink, ensure to follow the manufacturer’s instructions properly.
It may include shaking the bottle of ink to ensure its properly mixed or it may require adjusting the ink flow to match the heat press. Once the ink is prepared, you are ready to begin pressing the design on the substrate.
Set up the heat press for printing
Head pressing in sublimation is the process which requires precise pressure settings, temperature settings and timing. To make sure that your sublimation provides perfect output, you will need to set up the heat press correctly. For which you need to follow three essential steps.
1. Adjusting time and temperature settings
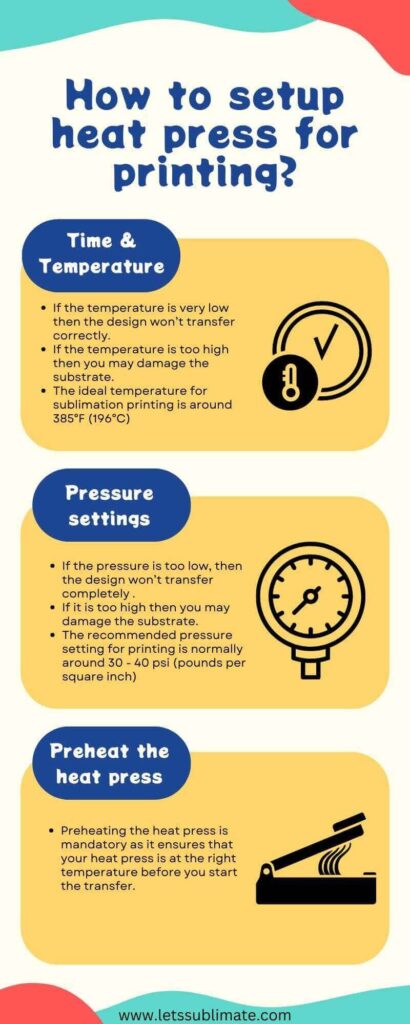
The initial step for setting the heat press is to adjust its time and temperature settings. For proper transferring of design, temperature is critical. If the temperature is very low then the design won’t transfer correctly, but if the temperature is too high then you may damage the substrate. So, the ideal temperature for sublimation printing is around 385°F (196°C) but it may vary based on the substrate you are using.
The time setting is also needed. You need to ensure that enough time should be given for proper transfer of design from transfer paper to substrate. So, the ideal time is around 45 – 60 seconds, but again this may vary based on the type of substrate you are sublimating.
While adjusting the time and temperature setting it is mandatory to be very precise. Use the thermometer to check the temperature of the heat press and the stopwatch for the accurate time transfer.
2. Adjusting pressure settings
Next step is to adjust the pressure setting of the heat press. It is important because it determines how well your design will print on the substrate. If the pressure is too low, then the design won’t transfer completely and if it is too high then you may damage the substrate.
The recommended pressure setting for printing is normally around 30 – 40 psi (pounds per square inch), however it varies as per substrate you are using. Adjust the settings of pressure carefully and make sure that you have applied enough pressure for transferring the design successfully.
3. Preheat the heat press
The final step is to preheat the heat press. Preheating the heat press is mandatory as it ensures that your heat press is at the right temperature before you start the transfer. This method also helps to eliminate the moisture on the heat press which may affect your transfer.
For preheating the heat press, you have to turn it on and then set it to the right temperature according to your substrate. Then allow the heat press to heat you for around 10 to 15 minus.
Transfer the design with heat press
When it comes to perfect printing via sublimation heat pressing, transferring your design is a crucial step. It is where the artwork goes from a digital file to a physical product. It requires three steps to be followed.
1. Printing design on transfer paper
The initial step is to transfer the design on the transfer paper. It can be done using a special sublimation ink and printer. This printed transfer paper is then placed on the substrate and then heat pressed.
When printing the design on transfer paper it is crucial to ensure that the design is mirrored/flipped horizontally. It is because the design will appear backwards when it is transferred on the substrate. You can easily flip the design in the design software before printing.
2. Place your transfer onto the substrate
Once the design is printed on the transfer paper, the next step will be to place the transfer on the substrate. This is where the design will be transferred on the final product. Before placing the transfer on the substrate, ensure that both substrate and transfer are clean and are free from any dust or debris.
It will help ensure that the artwork transfers accurately and cleanly.
When placing the transfer on the substrate, ensure to center it as precisely as possible. You can use the tape measure or ruler for measuring and marking the center of the substrate.
3. Apply heat & pressure to the transfer
The final step is to transfer the design by applying the heat and pressure to the transfer, it is where the actual magic happens and the artwork is transferred to the substrate. For applying heat and pressure you require a sublimation heat press which is a special piece of equipment which evenly applies heat and pressure across the substrate.
Make sure to adjust the temperature/time/pressure according to the manufacturer’s instructions for the paper and substrate. Once all the adjustments are done, preheat the heat press and then place the substrate and transfer paper into the heat press and then apply pressure.
After the transfer has been heat pressed, you need to carefully remove the transfer paper for revealing the finished product.
Finish the sublimation heat pressing project
When you have successfully applied the heat and pressure to the transfer, it is time to finish the heat pressing. It includes the three steps below.
1. Remove the transfer paper
The initial step in finishing the pressing process is to remove the transfer paper. For this you will have to let the substrate cool down and make sure it comes to room temperature. Once it is cooled down, peel off the transfer paper carefully. Make sure not to touch the design with your fingers as it may cause damage or smudging.
2. Inspect finished products
After removing the transfer paper, it is the time to inspect the finished product. You need to inspect the design closely and make sure that it has been transferred properly and there are no imperfections.
Look for the areas where the ink may have bled or the places where the design is not as sharp as you want it to be. If there is any issue, then you may have to adjust the heat press settings for the next project else you are good to go.
3. After care for the sublimated product
Once you have checked the finished product, it is necessary to take care of it properly for ensuring long lasting vibrant artwork. Here are a few tips which will help you to care for the product.
- Washing technique – Make sure to wash the products in cold water with a mild detergent and avoid using the fabric softener or bleach as it may damage the ink and can result in fading.
- Handle with care – You need to be gentle while handling the product, especially if the design is delicate. Avoid stretching or pulling it and make sure to store it in a safe place where it won’t get creased or crushed. Also, the storage area should be dry, cool and should not be exposed to direct moisture or sunlight.
Time and temperature guide for heat press
Even if you have the sharpest color artwork on the transfer paper, it will only transfer to the substrate (metal, ceramic, fabric etc.) once you use the right pressure and temperature settings. So, follow below chart for your reference
| Substrate | Temperature | Pressure | Time | Tips |
| Canvas material | 350 – 400 °F | Medium | 40 Seconds | Cover canvas with a Teflon sheet or parchment paper. |
| Cotton | 380 °F | Medium | 15 – 20 Seconds | Printed design must be hot, so remove it carefully from the heat press. |
| Ceramic Mugs | 350 – 400 °F | Medium | 2.5 – 3 Minutes | Before removing the transfer paper, make sure to cool down the mug to room temperature. |
| Polyester fabric | 250 – 270 °F | Medium | 50 – 60 Seconds | Always pre – press shirt for 3 – 5 seconds to remove moisture. You can also use heat tape to secure design and avoid ghosting. |
Sublimation heat press and temperature settings
What exactly are the correct temperature settings according to the substrate. Let’s check out.
| Material | Time | Temperature | Pressure |
| Metal | 60 – 80 Seconds | 400 °F | 40 psi |
| Ceramic | 150 – 210 Seconds | 350 – 400 °F | 40 psi |
| Polyester | 35 – 40 Seconds | 400 °F | 40 psi |
| Hardwood | 40 – 80 Seconds | 360 – 400 °F | 40 psi |
| Plywood | 60 – 70 Seconds | 400 °F | 40 psi |
| MDF (fiberboard) | 80 – 90 Seconds | 400 °F | 40 psi |
| Fiber reinforced plastic | 60 – 75 Seconds | 380 – 400 °F | 40 psi |
Well, the heat press settings are not a ‘one shoe fits all’ process. I have learned it the hard way, but you will not have to go through the same tough process. Every sublimation substrate has predefined pressure, time and temperature settings which helps to transfer the entire design from sublimation paper. But if you buy substrates which are sublimation ready like ceramic mugs and fabrics, the seller will share the right settings for the product.
Why are time and temperature settings important for transferring the design?
Using the right time and temperature settings with the heat press is important to get consistent and vibrant output. If the timings are wrong, it can result in poor quality transfer on the substrates. So, if the pressure is too less it can result in less vibrant output and too high temperature will result in poor finish. Other important factors are
1. Durability
When done properly, the printing technique offers long lasting designs which won’t peel or fade over time. The right heat setting ensures that the ink is completely penetrated in the substrate thus creating a strong bond with the material.
This process makes it resistant to wear and tear, giving you long lasting and durable output. On the other hand, incorrect heat press settings can result in poor adhesion, making the prints susceptible to damage and also reduce the durability.
2. Professional results
No matter who you are printing to, you always wish for high quality output. Right heat press settings not only make sure that design looks cool on various substrates, but it also minimizes the ink, paper and material wastage.
Consistency is the key for obtaining professional results and accurate temperature is the best place to begin with. You may need to do a few hits and trials before achieving optimal settings but trust me it’s worth it!
What safety precautions to follow when using the heat press machine?
Every heat press machine needs careful safety considerations as a very high temperature (exceeding 400°F /204°C) is involved with the printing process. Safety is must to prevent accidental burns or even fires.
Many substrates can easily retain heat for some time and will require to be removed from heat press with speed or gloves if you have incredible heat tolerance.
I advise you to always wear heat protective gloves so that you can easily handle the prints and then transfer them to the cooling shelf or tub without causing any accidental harm.
I also recommend having the key emergency items handy just in case. A small fire extinguisher and burn ointment.
If the sublimation printing is done at home, then I also advise to keep it out of reach of children and pets. Lastly, I always recommend turning off and unplugging the heat press machine.
Yes, many heat pressing machines have built – in safety features which automatically stops them from producing heat, but it is a good practice to follow safety measures.
Best Heat Press Machines for Sublimation
Using a reliable heat press machine makes huge impact in print quality. A consistent pressure and temperature ensures the design transfers properly without ghosting, fading or uneven prints.
Here are some reliable and beginner friendly heat press machines
Cricut EasyPress 2
- Even heat distribution
- Easy to use for beginners
- Ideal for small projects like cushions, bags and t-shirts
Fancierstudio Power Heat Press
- Good for people starting sublimation business
- Adjustable pressure and temperature
- Reliable and affordable
VEVOR Heat Press Machine
- Digital temperature control
- Suitable for bulk printing
- Good for mousepads, t-shirts, mugs and much more
Pro tip – I recommend choosing the heat press with adjustable pressure and temperature settings for getting best sublimation results.
Common mistakes when using Heat Press
Avoid these mistakes when you are using heat press.
- Removing transfer paper too early.
- Not using heat resistant tape.
- Using low – quality sublimation paper.
- Moving transfer paper during pressing.
- Not preheating the substrate.
- Applying too much or too little pressure.
- Using incorrect temperature settings.
Avoiding these mistakes will improve print durability and clarity.
Conclusion
Based on my experience working with sublimation printing projects, correct heat press settings make the biggest difference in print quality. After knowing how to use a heat press, you can achieve high-quality output. You can follow the above guidelines to do your projects. For any questions, you can comment below, or you can email me.
Learn More About Sublimation Printing
If you are new to sublimation, these guides will help you.
What is Sublimation Printing – Complete beginner guide.
What is Sublimation paper – Understand transfer paper types.
Why Sublimation is not transferring – Troubleshooting guide.
FAQs
What temperature should you use for Sublimation heat press?
Many sublimation projects require temperature range between 190°C to 205°C (375°F to 400°F). But, the exact temperature depends on material like metal, ceramic and polyester.
How much pressure is needed for sublimation heat press?
Medium pressure always works for various sublimation projects. If you will apply too much pressure then it can damage yoru substrate, but too little pressure can result in faded prints.
How long should you press sublimation designs?
Various sublimation transfers requires a time period of 40 to 60 seconds. However, ceramic mugs may need 180 to 240 seconds based on heat press machine.
Do you need to preheat fabrics before sublimation printing?
Yes, preheating your fabric for 5 to 10 seconds helps to remove wrinkles, moistures. It also helps the design to transfer evenly.
Is it ok to use heat press for cotton fabrics?
Sublimation printing works best for polyester fabrics. Cotton fabric need special sublimation coating or heat transfer vinyl.
Why my sublimation is prints fading after pressing?
Fading generally occurs due to low pressure, incorrect temperature or because of the use of low-quality sublimation paper or ink.
Do you need heat resistant tape when using heat press?
Yes, use of heat resistant tape prevents the transfer paper from shifting and also helps to avoid ghosting issues.